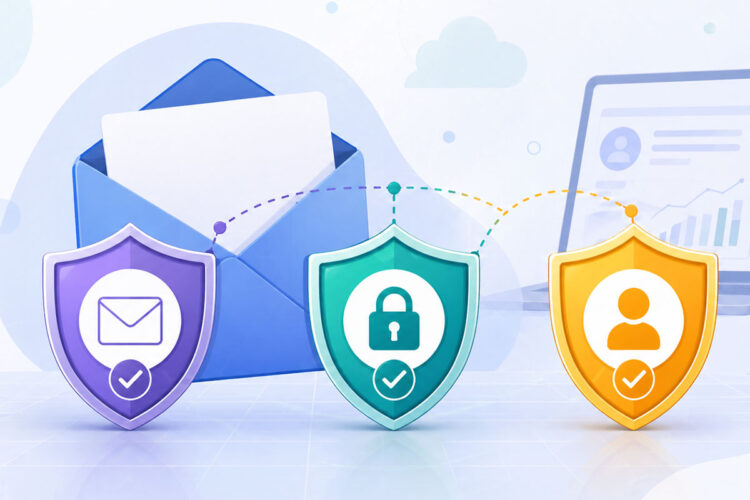
You’ve crafted the perfect email, poured over every word, and hit send. But have you ever wondered what happens next? Does your carefully constructed message land safely in your recipient’s inbox, or does it get flagged as spam, lost in the digital ether? For many, the journey of an email after hitting “send” is a mystery. Today, we’re going to demystify this process by diving into three crucial technologies that act as guardians of email authenticity: SPF, DKIM, and DMARC. Think of them as your email’s security guards, ensuring your messages are who they say they are and that they haven’t been tampered with.
This guide is designed for absolute beginners. We won’t be diving into overly technical jargon, but rather aim to give you a solid, conceptual understanding of what these acronyms mean and why they matter to you, whether you’re sending emails for personal use, managing a small business, or working within a larger organization. By the end of this article, you’ll be able to understand the fundamental building blocks of email authentication and appreciate the role they play in maintaining the integrity of online communication.
What is Email Authentication and Why Should You Care?
Imagine you receive a letter that looks like it’s from your bank, asking for your account details. The logo is there, the font looks right, but something feels off. How do you know if it’s genuine or a cleverly disguised scam? In the physical world, we rely on intuition, official letterheads, and sometimes even a quick phone call to verify. In the digital world, email relies on a more robust and automated system of verification.
Email authentication is the process of verifying that an email sender is who they claim to be. It’s like a digital handshake that reassures the recipient’s email server that the message coming from a particular domain (like yourcompany.com) actually originated from that domain and wasn’t sent by someone pretending to be you. Without these authentication mechanisms, it would be incredibly easy for malicious actors to impersonate legitimate senders, spreading phishing scams, malware, and disinformation.
The Problem of Email Spoofing
One of the most persistent problems in email communication is email spoofing. This is when a sender fabricates the email headers to make it appear as though the message originated from a legitimate sender. Think of it like putting a fake return address on an envelope. A spoofer might send an email with a “From” address of [email protected] when they are actually sending it from [email protected]. Without authentication, the recipient’s email server has no way of knowing this discrepancy, and the email might be delivered as if it were from your bank, leading to potential security breaches and loss of trust.
The Impact on Your Deliverability
Beyond security, email authentication plays a critical role in email deliverability. This refers to the ability of your emails to reach the intended recipients’ inboxes rather than being filtered into their spam folders. Email service providers (ESPs) like Gmail, Outlook, and Yahoo continuously evolve their spam filters. These filters heavily rely on authentication signals to determine the legitimacy of incoming emails. If your emails fail authentication checks, they are far more likely to be marked as spam, meaning your important messages – for marketing, customer service, or personal communication – might never be seen. Investing a little time in understanding and implementing SPF, DKIM, and DMARC is a significant step towards ensuring your emails get to where they need to go.
Building Trust and Reputation
Ultimately, email authentication is about building trust. When recipients’ email servers can confidently verify the authenticity of your emails, it builds a positive reputation for your domain. This trust is invaluable. It ensures that your legitimate communications are treated with respect, and it helps to protect your brand from being associated with malicious activities. For businesses, a strong email authentication setup can mean the difference between a thriving customer engagement strategy and one that is constantly battling low open rates and spam complaints.
SPF: The Sender Policy Framework – Who is Authorized to Send?
Let’s start with the first line of defense: SPF, or the Sender Policy Framework. Think of SPF as a guest list for your email server. It’s a DNS (Domain Name System) record that allows domain owners to specify which mail servers are authorized to send emails on behalf of their domain. When an email arrives at a recipient’s server, that server can look up the SPF record for the sender’s domain and check if the sending server is on the approved list.
The Core Concept: A DNS Record Dictating Who Can Send
At its heart, SPF is a TXT record published in your domain’s DNS zone. This record contains a list of IP addresses or hostnames that are permitted to send emails from your domain. It’s a proactive measure: you tell the world, “These are the only servers allowed to send emails from mydomain.com.”
How SPF Works in Practice
- Sender’s Mail Server: When you send an email from a server associated with
mydomain.com, the recipient server receives the email. - Recipient Server Queries DNS: The recipient server then performs a DNS lookup for
mydomain.comto find its SPF record. - Comparison: The recipient server compares the IP address of the server that sent the email with the IP addresses listed in the SPF record.
- Verdict: Based on the comparison, the recipient server makes a decision:
- Pass: If the sending IP address is listed and authorized, the email passes the SPF check.
- Fail: If the sending IP address is not listed and the SPF record explicitly forbids it, the email fails the SPF check.
- SoftFail: If the sending IP address is not listed, but the SPF record doesn’t explicitly prohibit it, it might be considered a soft fail. This often results in the email being delivered but marked with suspicion.
- Neutral: The SPF record says that it doesn’t have enough information to make a determination.
Constructing an SPF Record: Understanding the Syntax
SPF records are made up of mechanisms and qualifiers. While you don’t need to be an expert to set up a basic SPF record, understanding the components is helpful.
Mechanisms: Specifying Authorized Servers
a: Authorizes servers listed in the A record for the domain.mx: Authorizes servers listed in the MX (Mail Exchanger) records for the domain. This is common for domains that don’t have dedicated sending servers.ip4: Authorizes a specific IPv4 address. For example,ip4:192.0.2.1.ip6: Authorizes a specific IPv6 address.include: Authorizes servers listed in the SPF record of another domain. This is incredibly useful for services like Google Workspace, Microsoft 365, or email marketing platforms. For instance,include:_spf.google.comallows Google’s mail servers to send on your behalf.
Qualifiers: Defining the Action
+(Pass): Explicitly permits sending from the specified source. This is the default if no qualifier is present.-(Fail): Explicitly denies sending from the specified source. Emails from unauthorized sources will be rejected. This is generally recommended for stronger security.~(SoftFail): Indicates that the sender is likely unauthorized, but the recipient server should still accept the email, perhaps marking it with a lower trust score.?(Neutral): Indicates that the SPF record provides no statement about the sender’s authorization, essentially saying “I don’t know.”
The All-Inclusive Ending
all: This is the crucial part that specifies what to do with any servers not explicitly listed.+all: Very insecure. Allows anyone to send.~all: Moderate. Suggests emails from unlisted servers are suspect but not necessarily rejected.-all: Strongest. Strictly prohibits emails from any server not explicitly authorized. This is generally what you should aim for.
Example SPF Record:
Let’s say you use Google Workspace for your domain yourcompany.com and also send marketing emails through Mailchimp. Your SPF record might look something like this:
v=spf1 include:_spf.google.com include:spf.mailchimp.com -all
This record says:
v=spf1: This is an SPF record version 1.include:_spf.google.com: All servers authorized by Google’s SPF record can send mail foryourcompany.com.include:spf.mailchimp.com: All servers authorized by Mailchimp’s SPF record can send mail foryourcompany.com.-all: Any server not covered by the above inclusions is unauthorized and should cause the email to fail SPF authentication.
The Pitfalls of SPF
While powerful, SPF isn’t without its challenges:
Too Many DNS Lookups
SPF records can involve a lot of DNS lookups, especially when using multiple include mechanisms. Most SPF specifications limit the number of DNS lookups to 10. Exceeding this limit can cause SPF checks to fail. This is why it’s important to be judicious with include statements and to check with your email providers about their recommended SPF configurations.
IP Address Changes
If your email sending infrastructure uses dynamic IP addresses that change frequently, maintaining an accurate SPF record can be difficult, leading to failed authentication. Dedicated sending services or cloud-based platforms usually manage this for you.
The “Sender vs. Originator” Nuance
SPF checks the “Return-Path” or “MAIL FROM” address (also known as the envelope sender), not necessarily the “From” address you see in your inbox. This distinction is important, as this is what attackers can exploit if only SPF is used.
DKIM: DomainKeys Identified Mail – Ensuring Integrity and Authenticity
Now that we’ve established who can send emails from your domain with SPF, let’s introduce DKIM, or DomainKeys Identified Mail. If SPF is the guest list, DKIM is like the tamper-evident seal on every letter. DKIM adds a digital signature to your outgoing emails. This signature is generated using cryptography, and it allows the recipient server to verify that the email hasn’t been altered in transit and that it genuinely originated from your domain.
The Magic of Digital Signatures
DKIM uses public-key cryptography. You generate a pair of cryptographic keys: a private key and a public key.
- Private Key: This key is kept secret on your mail server (or the server of your email service provider).
- Public Key: This key is published in your domain’s DNS as a TXT record.
How DKIM Works in Practice
- Signing the Email: When you send an email, your mail server (or the service provider’s server) uses your private key to create a unique digital signature. This signature is generated based on the content of the email, including headers (like Subject and To) and the body. This signature is then added to the email’s headers.
- Recipient Server Verification: When the recipient server receives the email, it extracts the DKIM signature from the headers.
- DNS Lookup for Public Key: The recipient server then looks up your domain’s DNS to find the public key associated with the DKIM signature.
- Verification: Using the public key, the recipient server attempts to decrypt the digital signature. It then recalculates a signature based on the received email’s content and compares it with the decrypted signature.
- Verdict:
- Pass: If the decrypted signature matches the recalculated signature, the email passes the DKIM check. This confirms two things:
- Authenticity: The email was sent by a server possessing the corresponding private key for your domain.
- Integrity: The email’s content has not been modified since it was signed.
- Fail: If the signatures don’t match, the DKIM check fails, indicating a potential tampering or an invalid signature.
Configuring DKIM and DNS Records
Setting up DKIM involves generating keys and publishing the public key in your DNS. Most modern email providers and marketing platforms will guide you through this process.
Generating Keys
This is usually handled by your email service provider. They’ll generate a pair of keys and provide you with instructions on how to publish the public key.
The DKIM DNS TXT Record
The DKIM public key is published as a TXT record in your DNS. This record has a specific format, including:
k=(Key Type): Usuallyrsa.p=(Public Key): Your actual public key.h=(Hash Algorithm): Specifies the hashing algorithm used (e.g.,sha256).s=(Selector): A unique identifier used to distinguish between different DKIM keys or signing configurations for the same domain. This allows you to have multiple DKIM keys for different services or for key rotation.
Example DKIM DNS Record:
A DKIM record might look something like this:
selector1._domainkey.yourcompany.com IN TXT "v=DKIM1; k=rsa; p=MIIBIjANBgkqhkiG9w0BAQEFAAOCAQ8AMIIBCgKCAQEAxH0p..."
Here:
selector1._domainkey.yourcompany.comis the hostname for the record (the selectorselector1combined with the domain key designation).- The value within the quotes is the actual DKIM record, containing version, key type, and the public key.
Advantages of DKIM
DKIM offers significant advantages:
- Tamper Detection: It’s a powerful deterrent against email content modification. If an attacker changes even a single character in the email, the DKIM signature verification will fail.
- Independent Verification: The verification process doesn’t rely on comparing IP addresses, making it more robust against infrastructure changes.
- Enhanced Anti-Phishing: By verifying the sender’s domain and message integrity, DKIM makes it harder for phishers to impersonate legitimate organizations.
Potential DKIM Challenges
- Implementation Complexity: Setting up DKIM can be more technically involved than SPF, especially if you’re managing your own mail servers.
- Key Management: Proper management of private keys is crucial. If a private key is compromised, an attacker can forge DKIM signatures for your domain. Key rotation is a good practice.
- Selector Conflicts: If multiple services are sending email for your domain and using the same DKIM selector, it can lead to conflicts. Using distinct selectors for each service is recommended.
DMARC: Domain-based Message Authentication, Reporting & Conformance – The Policy Enforcer
So far, we’ve seen SPF (the guest list) and DKIM (the tamper-evident seal). But what happens when an email fails these checks? Do you reject it immediately? Do you just log it? This is where DMARC, or Domain-based Message Authentication, Reporting & Conformance, comes in. DMARC acts as the supervisor, dictating how email systems should handle emails that fail SPF and DKIM checks, and it provides valuable reporting on these activities.
The Role of DMARC: Policy, Reporting, and Control
DMARC builds upon SPF and DKIM. It’s a DNS TXT record that tells receiving mail servers what to do when an email fails both SPF and DKIM checks (or specifically, when the SPF check aligns with the sender’s domain, and the DKIM check aligns with the sender’s domain).
How DMARC Works: Policies and Alignments
DMARC introduces two key concepts: alignment and policy.
Alignment: The Crucial Link
For DMARC to work effectively, the domain used in the “From” header (what the recipient sees) must be aligned with the domain that passed either the SPF check or the DKIM check.
- SPF Alignment: The domain in the “From” header must be the same as, or a subdomain of, the domain that passed the SPF check (the “Return-Path” or “MAIL FROM” domain).
- DKIM Alignment: The domain in the “From” header must be the same as the DKIM signing domain (the
d=tag in the DKIM signature).
If SPF passes but the “From” domain is different from the SPF domain, it’s SPF alignment failure. Similarly, if DKIM passes but the “From” domain is different from the DKIM signing domain, it’s DKIM alignment failure. DMARC requires at least one of these alignments to pass for the message to be considered authenticated.
DMARC Policies: Dictating the Action
The DMARC record specifies a policy for how recipient servers should treat emails that fail DMARC alignment checks. These policies are set using the p= tag in the DMARC record:
p=none(Monitor Mode): This is the recommended starting point. In this mode, no action is taken on failing emails, but reports are sent. This allows you to gather data and understand your email sending landscape before enforcing stricter policies.p=quarantine(Quarantine): Emails that fail DMARC alignment are delivered to the recipient’s spam folder. This is a good step up from monitoring, as it reduces the likelihood of spoofed emails reaching the inbox.p=reject(Reject): Emails that fail DMARC alignment are outright rejected by the receiving server and not delivered. This is the strongest policy and provides the highest level of protection against spoofing.
DMARC Reporting: Gaining Visibility
One of DMARC’s most powerful features is its reporting capability. DMARC allows receiving servers to send aggregate reports (RUA) and forensic reports (RUF) back to specified email addresses.
Aggregate Reports (RUA)
These reports are sent daily and provide a summary of email traffic, including:
- The number of emails sent from your domain.
- How many passed or failed SPF, DKIM, and DMARC.
- Which IP addresses were used to send emails.
- Which policy was applied (none, quarantine, reject).
These reports are crucial for understanding who is sending emails on your behalf, identifying potential spoofing activity, and troubleshooting authentication issues. They are typically sent in XML format, and specialized DMARC reporting services can help you parse and visualize this data.
Forensic Reports (RUF)
These are individual reports sent for each email that fails DMARC. They contain more detailed information about the failed email, including headers and sometimes even parts of the body. RUF reports can be very useful for investigating specific incidents of spoofing, but they can also contain sensitive information and may not be supported by all receiving mail servers due to privacy concerns.
Implementing DMARC: A Phased Approach
Implementing DMARC is best done in phases:
- Monitor (
p=none): Start by publishing a DMARC record withp=none. Set up a reporting address (RUA) and begin collecting reports. Analyze these reports to understand your email ecosystem. Identify all legitimate sources of email associated with your domain. - Quarantine (
p=quarantine): Once you’re confident that you’ve identified all legitimate senders and their configurations, you can gradually move top=quarantine. This will start moving suspicious emails to spam folders, further protecting your recipients. Continue monitoring reports. - Reject (
p=reject): The final step is to move top=reject. This provides the strongest protection by preventing any spoofed emails from being delivered. Continue monitoring reports to ensure there are no unexpected impacts on legitimate email delivery.
The Importance of Alignment for DMARC
It’s vital to understand that DMARC checks for alignment. Just because SPF passes and DKIM passes doesn’t mean DMARC will pass if the domains don’t align correctly.
- Example: If your “From” address is
[email protected]and an email is sent through a third-party service that signs with DKIM usingdkim.thirdparty.com, DMARC will likely fail if the DKIM signature isd=thirdparty.com. You need either the DKIM signature to bed=yourcompany.com(if your provider supports this) or the SPF check to align withyourcompany.com.
Putting It All Together: The Synergy of SPF, DKIM, and DMARC
You now have a foundational understanding of SPF, DKIM, and DMARC individually. But their true power lies in how they work together, creating a robust defense against email fraud and improving your email deliverability. Think of them as a three-tiered security system.
SPF, DKIM, and DMARC: A United Front
- SPF: Authorizes who can send email from your domain, focusing on the IP address of the sending server.
- DKIM: Provides cryptographic assurance that the email hasn’t been tampered with and originated from a server with the correct private key, focusing on the message integrity.
- DMARC: Orchestrates the use of SPF and DKIM, defines what to do with emails that fail checks, checks for domain alignment, and provides invaluable reporting.
Without DMARC, even if SPF and DKIM are correctly implemented, a receiving server might still deliver an email that technically passes these checks but is still spoofed in the visible “From” address. DMARC’s alignment checks are critical here.
The Ideal Scenario: A Trifecta of Trust
For maximum email security and deliverability, you should aim to have all three authentication methods properly configured and working in harmony.
- Implement SPF: Ensure your SPF record accurately lists all legitimate sources of email for your domain. Use
-allfor strong protection. - Implement DKIM: Set up DKIM signing for all your outgoing emails. Use a unique selector for each sending service, if possible.
- Implement DMARC: Start with
p=noneand carefully analyze the reports. Gradually move top=quarantineand thenp=rejectas you gain confidence.
When all these checks pass and align correctly, the recipient’s server has very high confidence that the email is legitimate and has not been compromised. This significantly increases the chances of your email landing in the inbox.
Beyond the Basics: Advanced Considerations
As you become more comfortable, you can explore advanced DMARC settings and concepts:
sp=(Subdomain Policy): This tag allows you to set a policy specifically for subdomains of your main domain.pct=(Percentage): This tag in the DMARC record allows you to gradually roll out policies likequarantineorrejectto a percentage of your mail traffic. This is a safer way to transition to stricter policies.- DMARC Reporting Services: Using specialized services can help you process and visualize the complex XML reports from DMARC, making it much easier to manage your email authentication.
Common Misconceptions and Getting Started
Understanding SPF, DKIM, and DMARC can feel overwhelming at first, and several common misconceptions can trip beginners up. Let’s address a few to clear the air and get you on the right path.
Common Misconceptions
- “I don’t need this if I only send personal emails.” Even personal emails can be spoofed. If your personal email account is compromised or used for sending, authentication helps protect your reputation and prevent your contacts from receiving spam or phishing emails from your address.
- “Just setting up SPF is enough.” SPF alone isn’t enough because it primarily checks the “MAIL FROM” (envelope sender) address, which isn’t always visible to the end-user. Attackers can easily spoof the visible “From” address while using a legitimate envelope sender that passes SPF. DKIM and DMARC are crucial for verifying the visible sender.
- “My email provider handles all of this for me.” While many providers configure SPF and DKIM for their service, you still need to ensure your domain’s DNS records are correctly set up to reference these services, and you are responsible for publishing DMARC. You also need to understand which services are sending on your behalf from your domain.
- “DMARC rejects emails by default.” This is incorrect. The default policy for DMARC is
p=none(monitor mode). You explicitly set the policy toquarantineorreject.
Your First Steps
- Identify Your Email Sending Services: Make a list of all the services and platforms that send emails on behalf of your domain. This includes your primary email provider (e.g., Google Workspace, Microsoft 365), email marketing platforms (e.g., Mailchimp, SendGrid), CRM systems, support ticketing systems, and any custom applications.
- Check Your Current SPF Record: Access your domain’s DNS settings. Look for a TXT record that starts with
v=spf1. Understand what it currently authorizes. - Find SPF/DKIM Records for Your Services: For each sending service, consult their documentation for the correct SPF
includestatements and DKIM setup instructions (including the selector). - Publish Your SPF Record: Combine all necessary
includestatements and the-allmechanism into a single SPF record for your domain. Remember, you can only have one SPF record per domain. - Configure DKIM: Follow the instructions from each of your sending services to generate keys and publish the public keys as TXT records in your DNS. Use distinct selectors for different services.
- Publish Your DMARC Record: Start with a simple DMARC record like:
_dmarc.yourcompany.com IN TXT "v=DMARC1; p=none; rua=mailto:[email protected]"
Replace yourcompany.com with your actual domain and [email protected] with an email address where you want to receive reports.
- Monitor and Iterate: Regularly check your SPF, DKIM, and DMARC alignment using online testing tools and analyze the DMARC reports you receive. Gradually adjust your DMARC policy as you gain confidence.
By taking these steps, you’re not just ticking boxes; you’re actively building a more secure and trustworthy communication channel for yourself, your organization, and your recipients. Understanding SPF, DKIM, and DMARC is an investment that pays dividends in enhanced security, improved email deliverability, and ultimately, greater trust in the digital world.
FAQs
What is SPF?
SPF, or Sender Policy Framework, is an email authentication method that allows the owner of a domain to specify which mail servers are authorized to send email on behalf of that domain.
What is DKIM?
DKIM, or DomainKeys Identified Mail, is an email authentication method that allows the sender to digitally sign an email with a private key. The recipient can then verify the signature using the sender’s public key, ensuring the email has not been tampered with.
What is DMARC?
DMARC, or Domain-based Message Authentication, Reporting, and Conformance, is an email authentication protocol that builds on SPF and DKIM to provide a way for email senders to instruct email receivers on how to handle unauthenticated emails.
How do SPF, DKIM, and DMARC work together?
SPF, DKIM, and DMARC work together to provide a comprehensive email authentication system. SPF specifies which mail servers are authorized to send email for a domain, DKIM provides a way to verify the authenticity of the email, and DMARC allows the sender to specify how unauthenticated emails should be handled.
Why are SPF, DKIM, and DMARC important for email security?
SPF, DKIM, and DMARC are important for email security because they help prevent email spoofing, phishing, and other malicious activities. By implementing these authentication methods, organizations can protect their email domains and improve the trustworthiness of their emails.